
Capture
Document it once, by just doing it.
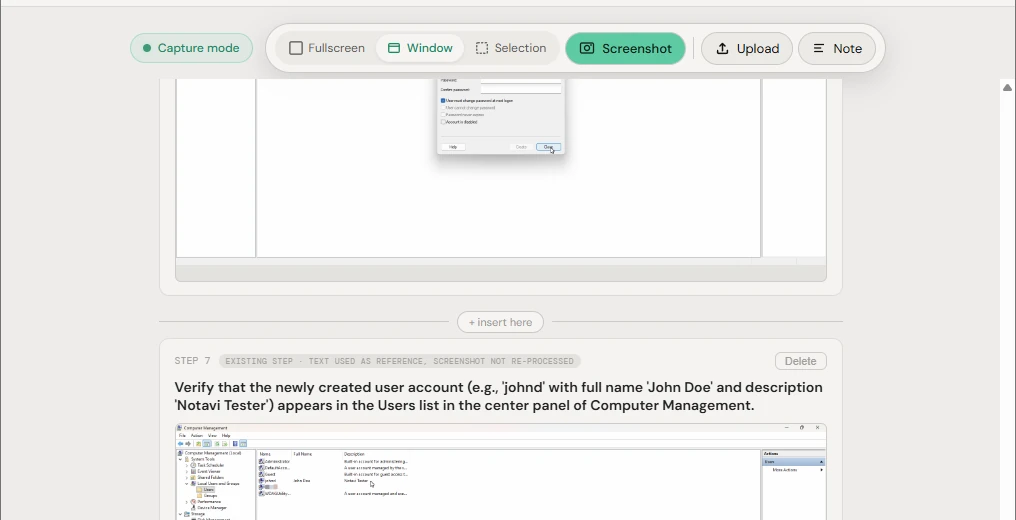
Stop writing procedures from scratch. Run through the task the way you always do, grab each step as you go, and Notavi turns the lot into a clean, numbered guide with screenshots. And it records nothing on its own — a step is captured only when you ask for one.
One pass through the task
You do the procedure. Notavi grabs the steps.
A session is one continuous chunk of work that becomes one guide. Work through the thing you’re documenting and capture each step as it happens — the first capture starts the session automatically, and each one adds a titled step with its screenshot.
The mouse-on-the-step technique
Capture while your cursor is over the thing you’re describing — the button you just clicked, the field you just filled. That cursor position is the cue Notavi uses to know what’s active in the step, so the writeup points at the right place.
Private by design
It captures only when you ask. Nothing else.
This is the part your security team cares about, so here it is plainly: Notavi does not watch your screen, log your keystrokes, or snap a picture every time you click. There is no background recording to switch off, because there was never any recording running. A step exists only because you pressed a key to make it.
No keylogging.
Notavi never records what you type. It captures a screenshot of a step — only on your command — and nothing about your keystrokes.
No click-capture.
It doesn’t snap a shot on every click or watch in the background. There’s no always-on recorder — steps happen only when you press a shortcut.
Shortcuts you set.
You get two capture shortcuts and you choose the keys yourself. The defaults are a starting point, not a fixed behaviour.
Your capture shortcuts
Two keys, both yours to change.
Notavi ships with two capture shortcuts so you can keep one hand on the keyboard while you work. Both are remappable in Settings — set them to whatever fits your muscle memory.
Three capture modes
Frame each step exactly right.
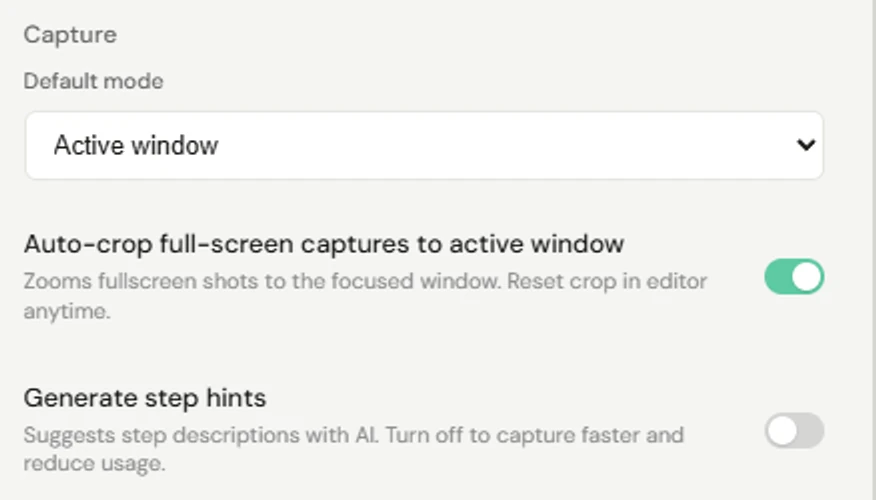
Pick the mode that fits the step you’re documenting, and set a default in Settings so every session starts the way you work. The capture shortcuts fire in Screenshot mode; in the editor, every shot can still be zoomed and cropped after the fact — and the original capture is always kept intact.
- FullscreenThe whole display — best when context across windows is the point.
- WindowJust the focused window — Notavi crops out the desktop and dock for you.
- SelectionDrag a region — best when a single panel or dialog is all that matters.
Edit & mark up
Write it by hand, or let AI do it.
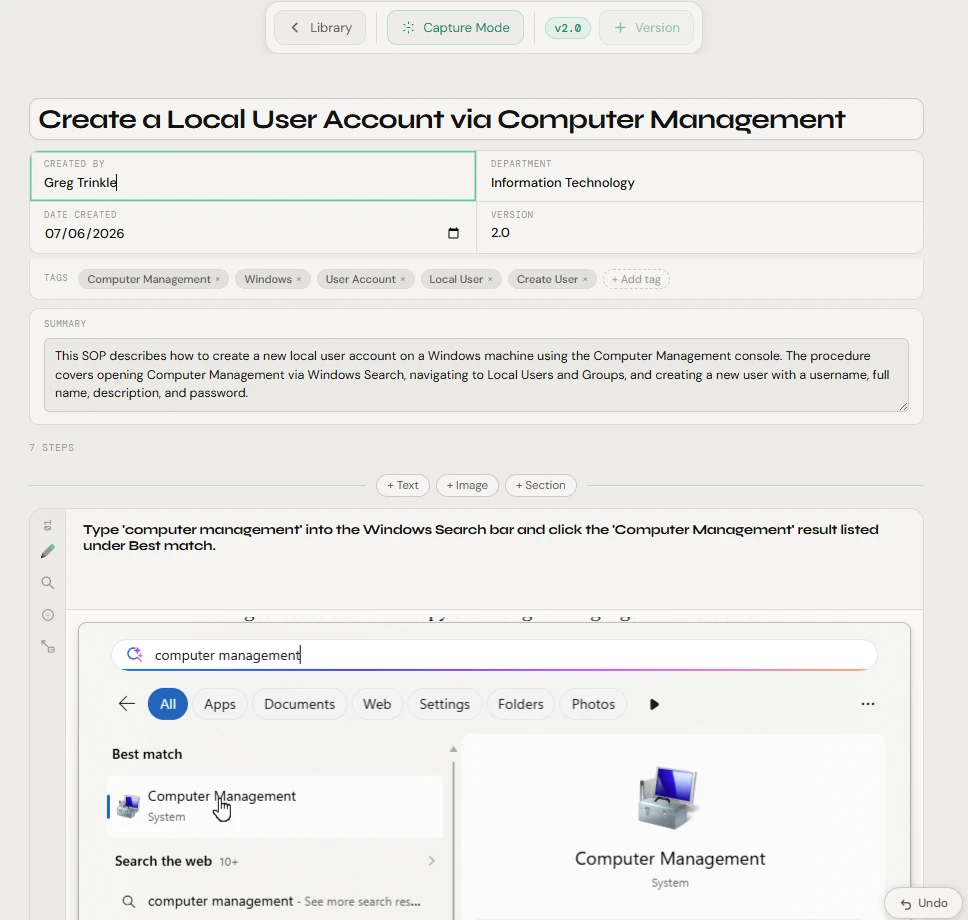
Documenting is free. Build a guide entirely by hand — add steps, text and sections, reorder them, and edit any title or instruction in place. Prefer not to write? Submit the session and Notavi’s optional AI writeup returns a titled step for every screenshot. The AI writeup is a paid convenience — it’s never required to document.
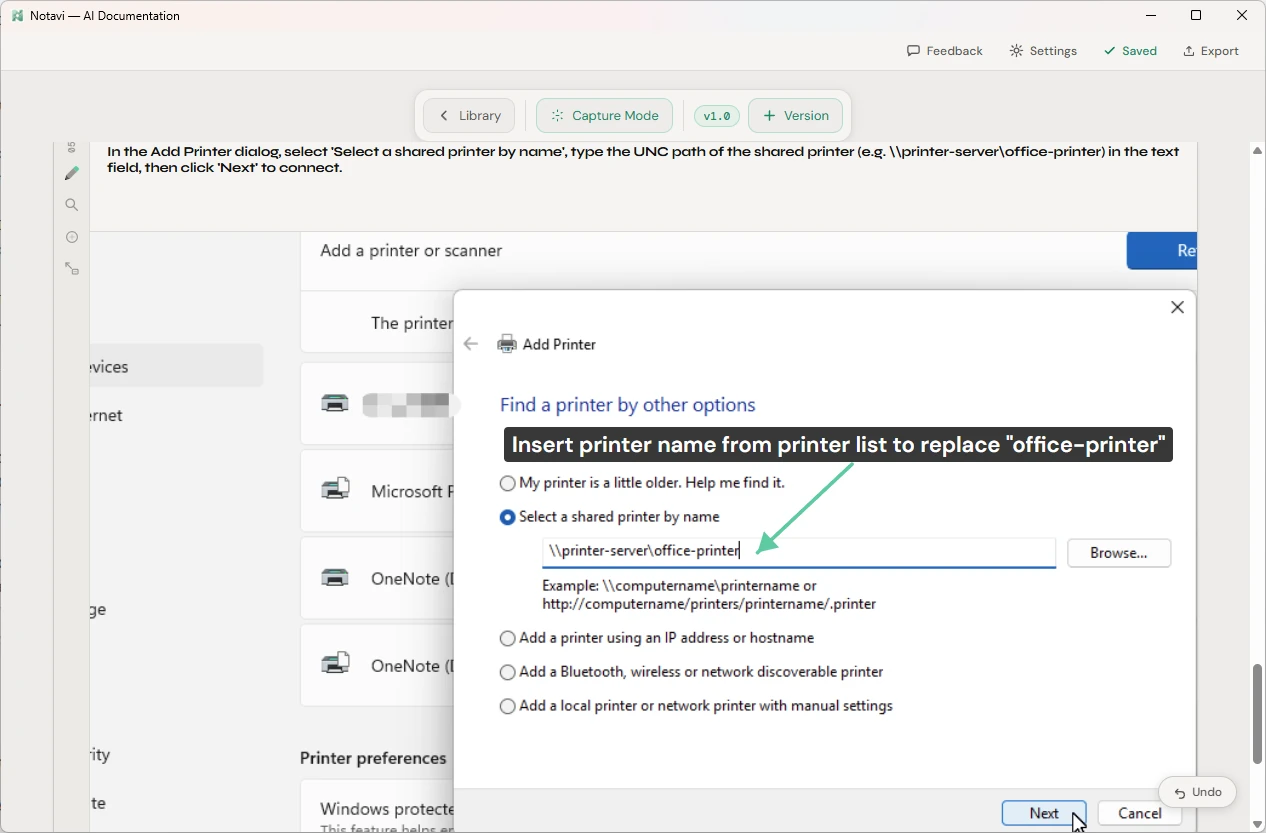
Blur permanently redacts anything sensitive — names, IDs, internal links — right on the screenshot. Do it before submitting if it shouldn’t reach the AI either; the blur is baked in, not a layer someone can peel back later.
What happens to what you capture
Captured on your command, kept in your storage.
The guides you capture live in storage you already own — any cloud you use, from OneDrive and iCloud to Dropbox, Proton or SharePoint — never our servers. If you ask AI to write a session up, only that session’s captured steps are sent for processing — on US-based infrastructure — and never used to train AI. Everything else stays with you.
- Captured only when you ask
- Stays in your storage
- Never used to train AI
Capture your first procedure today.
Free to build your own library, in storage you own. Add the AI writeup whenever you want it.
Free to build your own library · Apple Silicon Mac (M1+) · Windows 10/11